
Table of Contents
Power BI offers unparalleled features for analysis and visualization. In this post, we have explained the quickest way to connect Power BI to Oracle NetSuite and how you can add comprehensive planning and budgeting.
Step By Step Process: Connect NetSuite with Power BI
In this example, we will be using Acterys Apps, a Power BI integration tool, to connect NetSuite with Power BI.
To get started with Power BI, a few things you would want to do are:
Step 1: Create a free trial account at Acterys Trial
Step 2: After your account has been set up, click on the “Integration” menu and go to the “Oracle NetSuite” section:
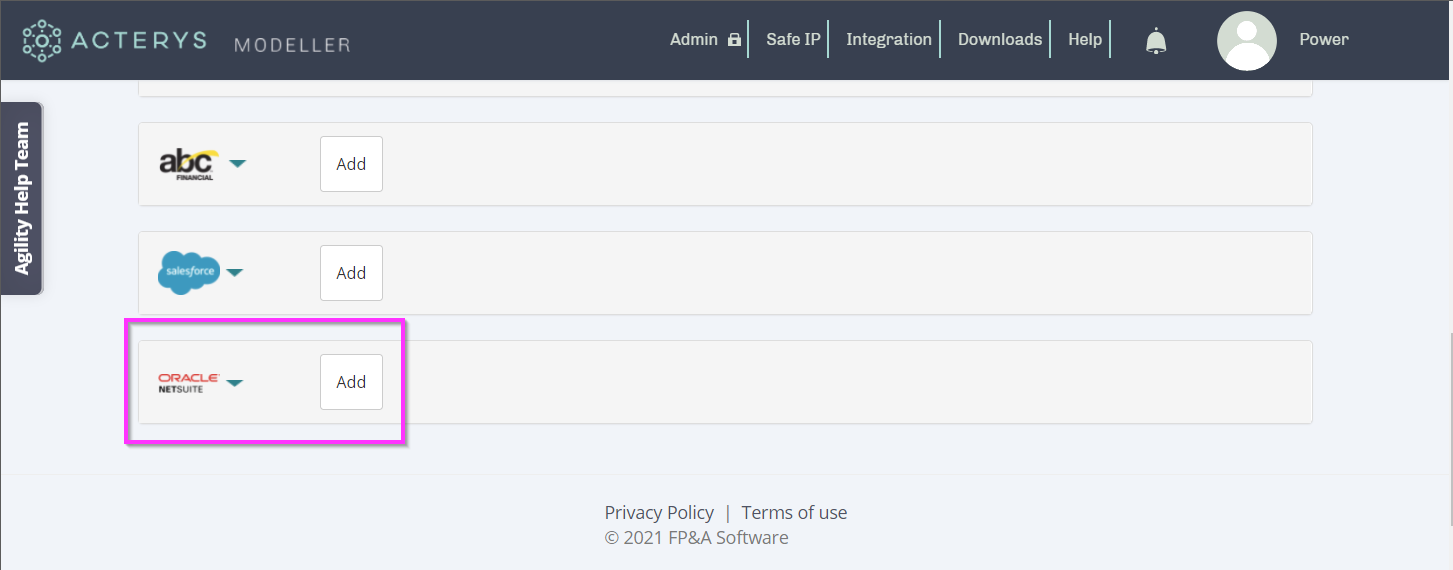
Step 3: Click on “Add” and enter your authentication details:
Step 4: Following that Acterys will create database tables with all Oracle NetSuite data selected in an optimal format for analysis that is also write enabled. Users can, for example, edit dimensions and map accounts or create planning and simulation models as required in either the Acterys Modeller in the browser or using the 8 Acterys Power BI visuals
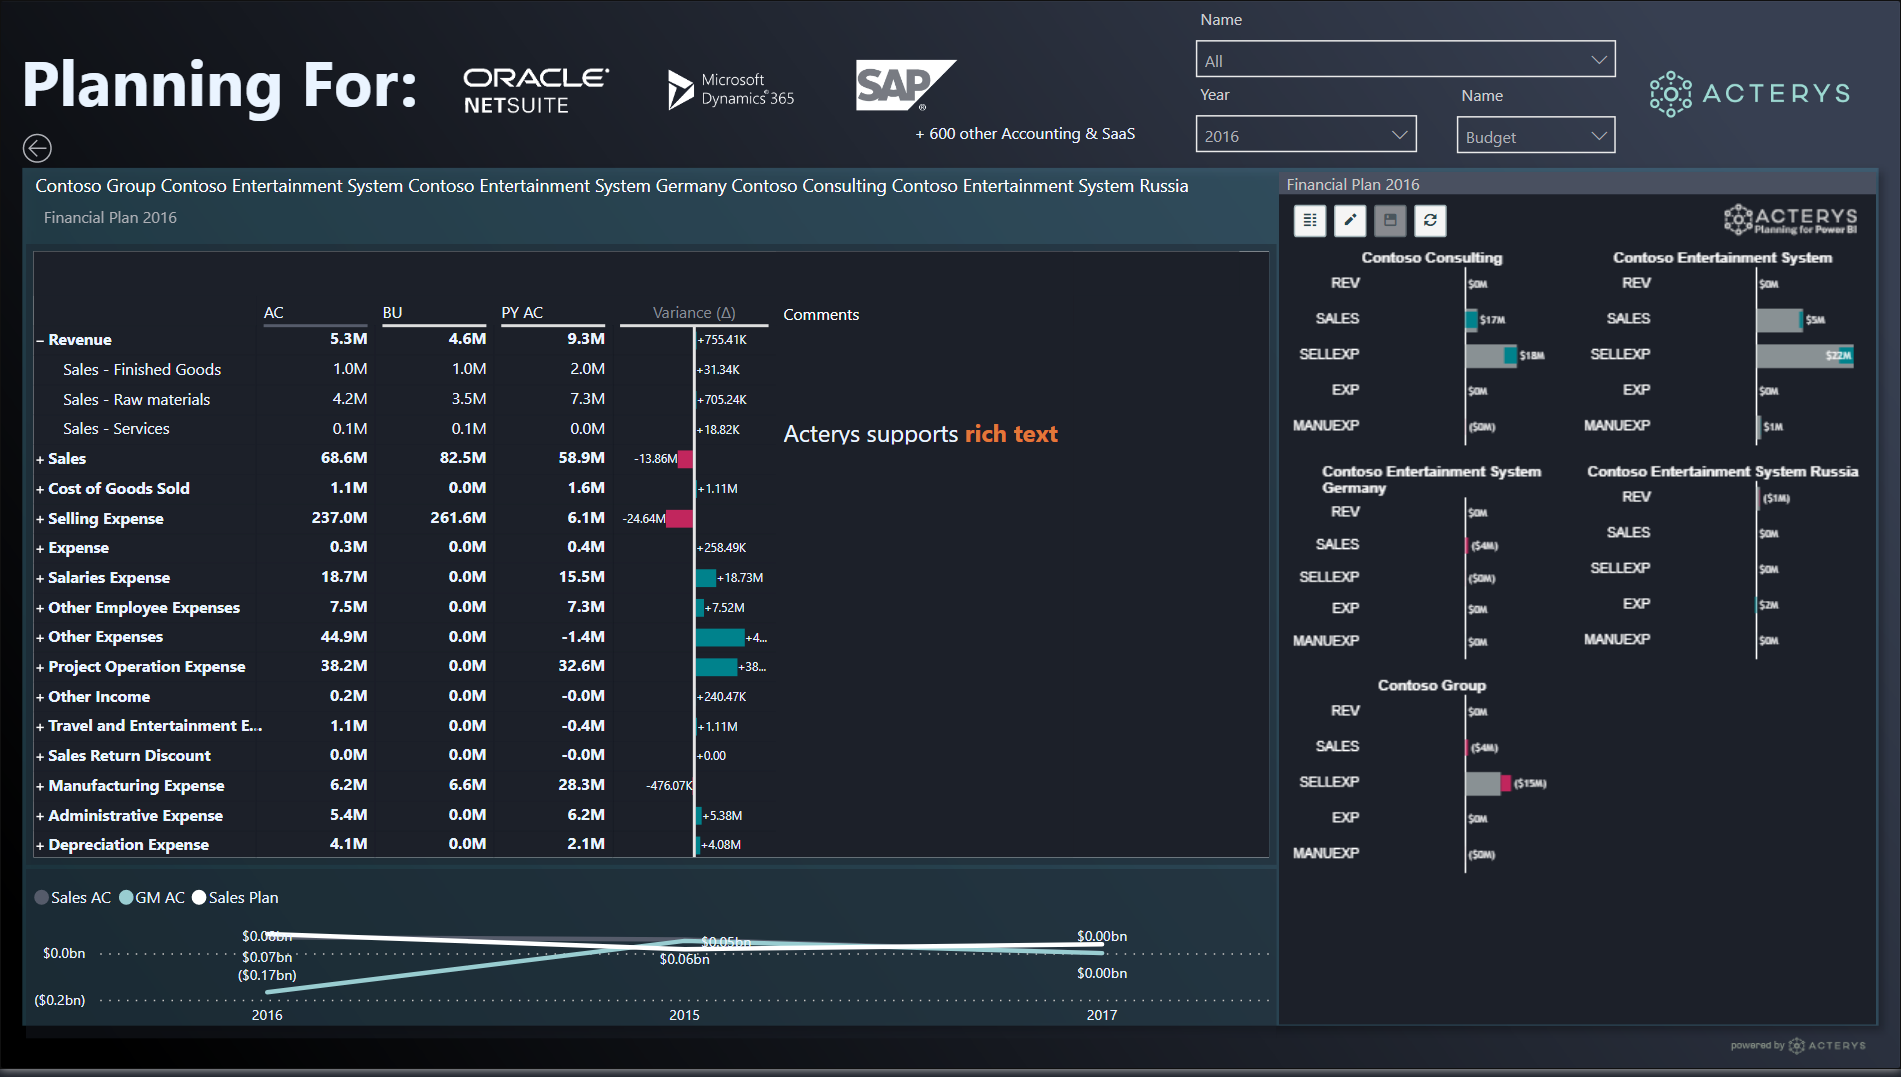
Step 5: With the Acterys Power BI App For NetSuite, you immediately have a very comprehensive, fully editable Power BI report template, or you can just connect with a normal Azure/SQL Server connection, add the tables that you need, and immediately start your analyses and planning based an optimal data warehouse format:
[ctabutton title=”Need Tailored Reporting, Planning & Analytics Solutions?” content=”Talk to our solution experts now” button=”Book a Meeting” url=”https://acterys.com/book-a-meeting/”]
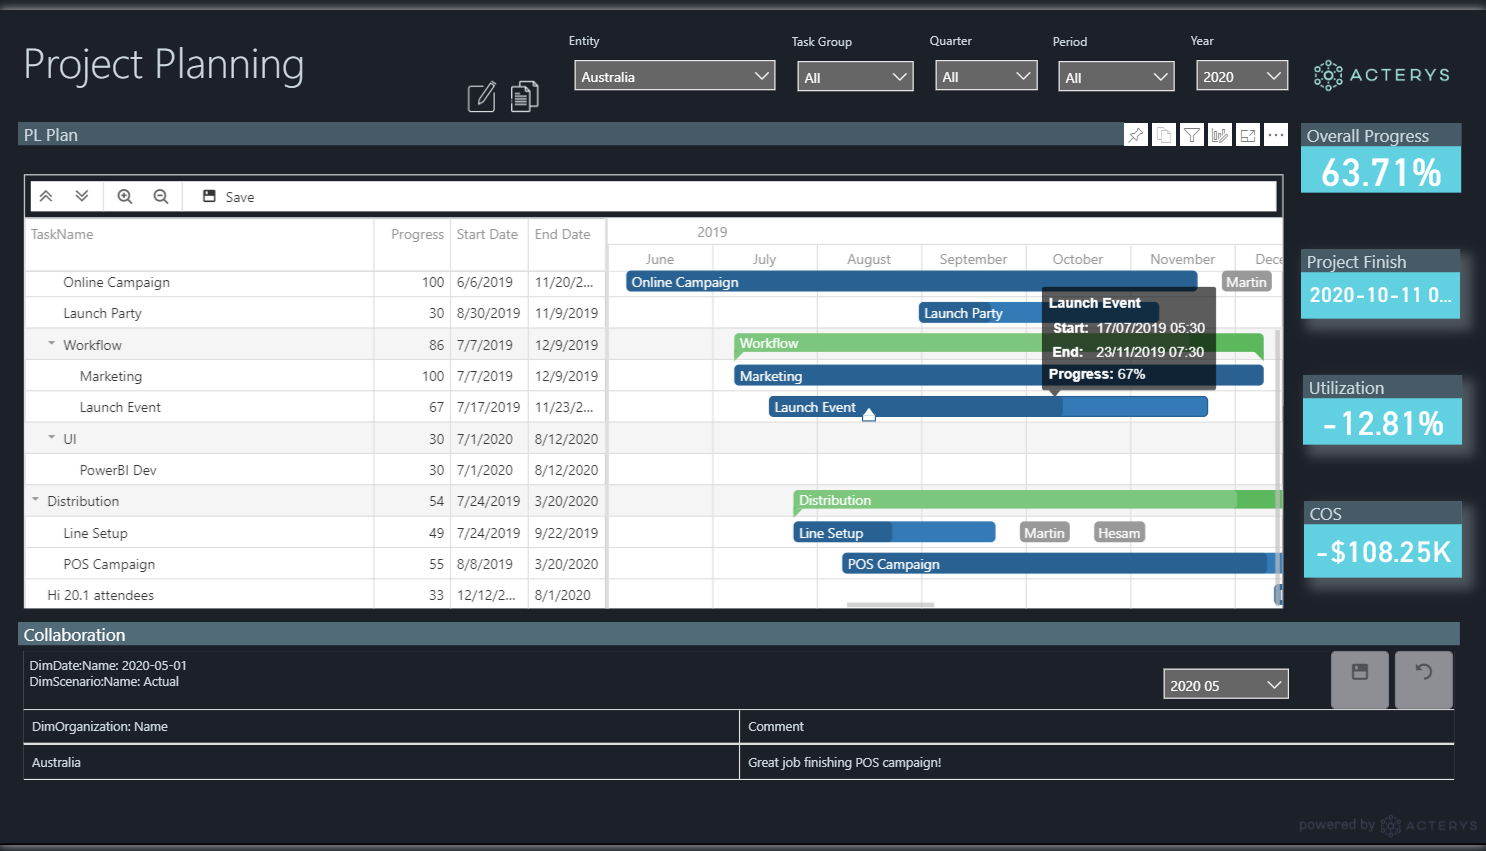
Step 6: Now you can use all planning and collaboration features through this Power BI NetSuite integration and using Acterys Visuals: Business Apps – Microsoft AppSource
Here are a few samples:
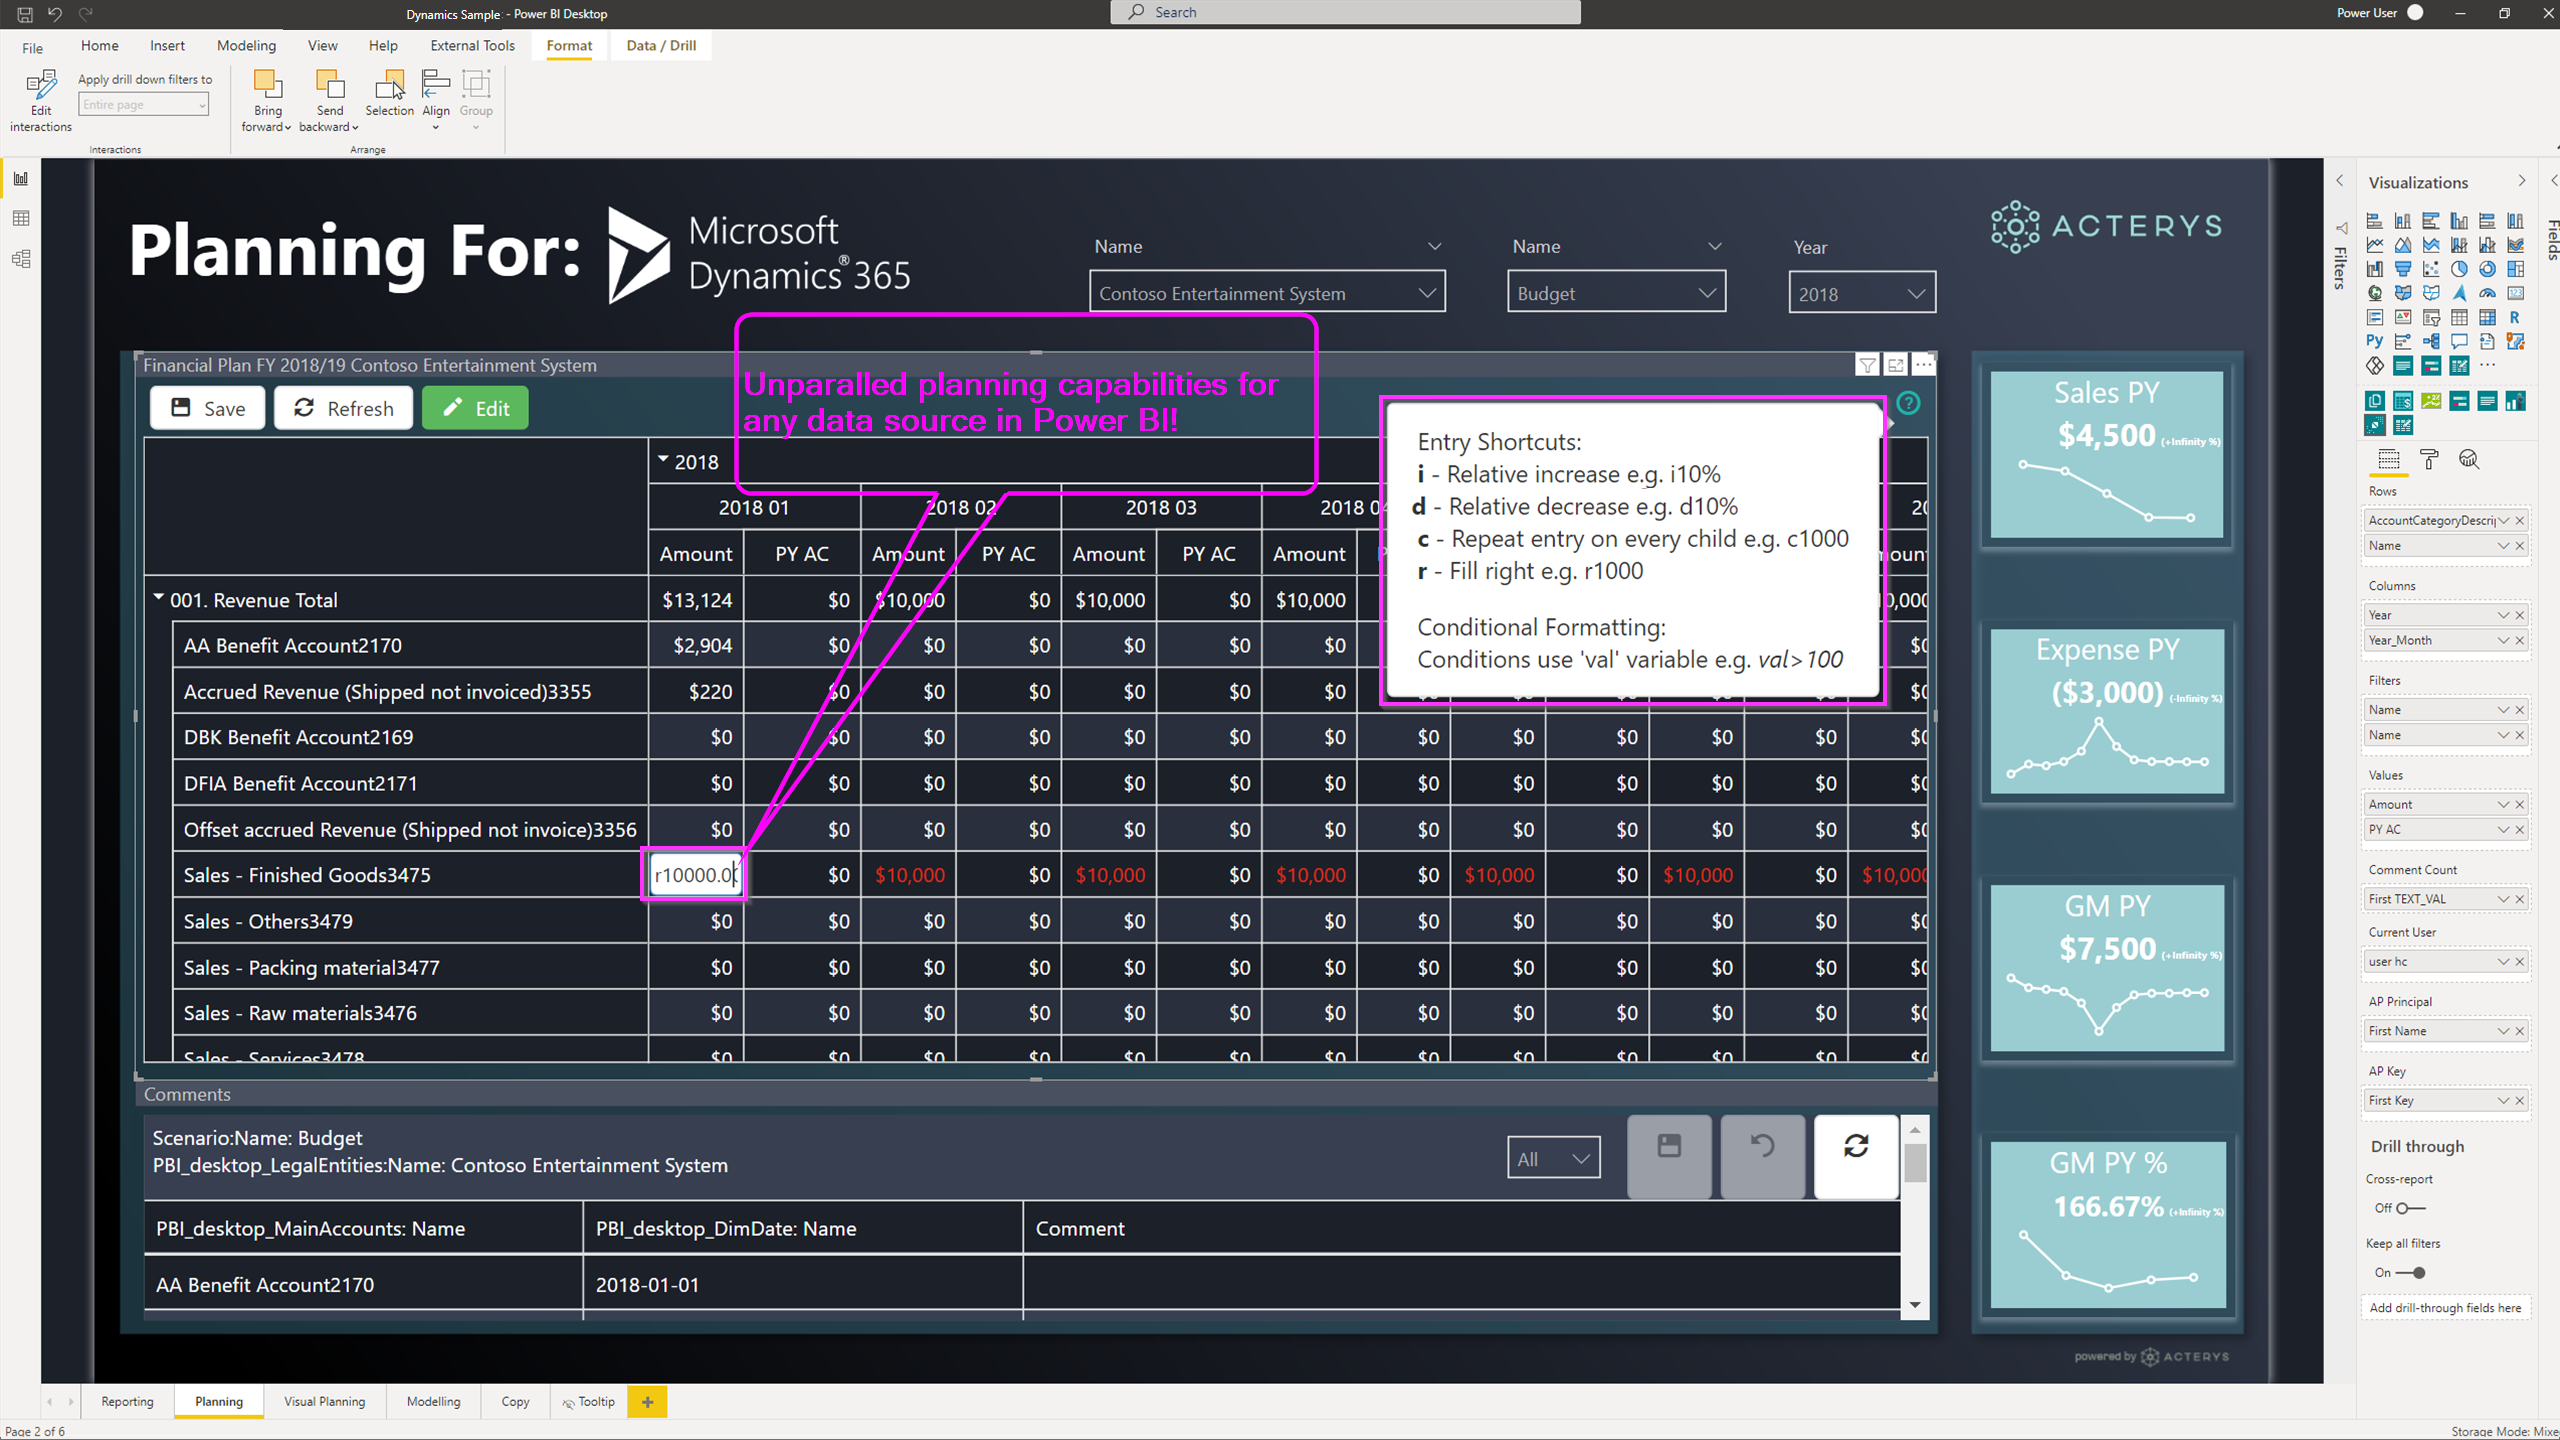
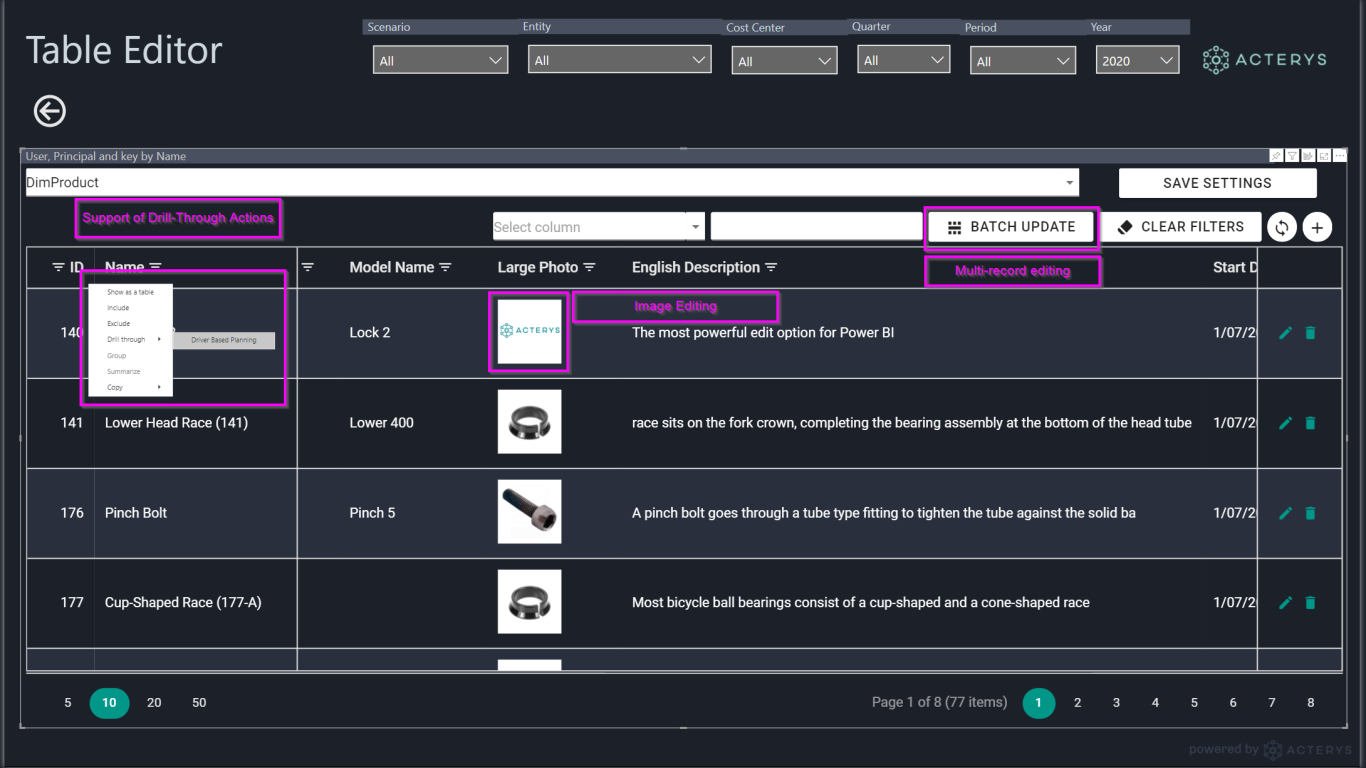
We hope you liked our article on how you can easily connect NetSuite with Power BI with the help of Acterys power apps. If you are interested in learning more about Acterys Netsuite/Power BI connector, then get in touch with us today!
[ctabutton title=”End-to-End Reporting & Planning Package” content=”Connect any system you want – for unlimited systems” button=”Explore Acterys Apps” url=”https://acterys.com/acterys-apps/”]


